Installing fonts on Windows
Let's start with perhaps the most common operating system - Windows. From the very beginning, you need to pay attention to the fact that you can use the EOT and TTF format fonts as system fonts. The first installation method looks like this:
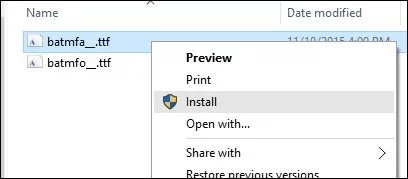
Method 1. Select the required files. Using the right mouse button, select "Install". After that the installation should start automatically. As you can see, the most difficult thing in this procedure is to wait for the installation to finish.
Method 2. It will take a little more effort to install fonts this way. It is used in the event that you have a large data array or the "Install" or "Install" item in the context menu has not appeared (yes, this also happens). So, go to the Windows folder where you should find the "Fonts" directory. Move files there. Done.
The difficulty arises at the moment of getting into Fonts. In addition to the Windows directory, you can use the WIN + R key combination or the control panel.
The first method will open the Run context menu. Copy the line "%windir%\fonts" and enter it there. Click on the OK button.
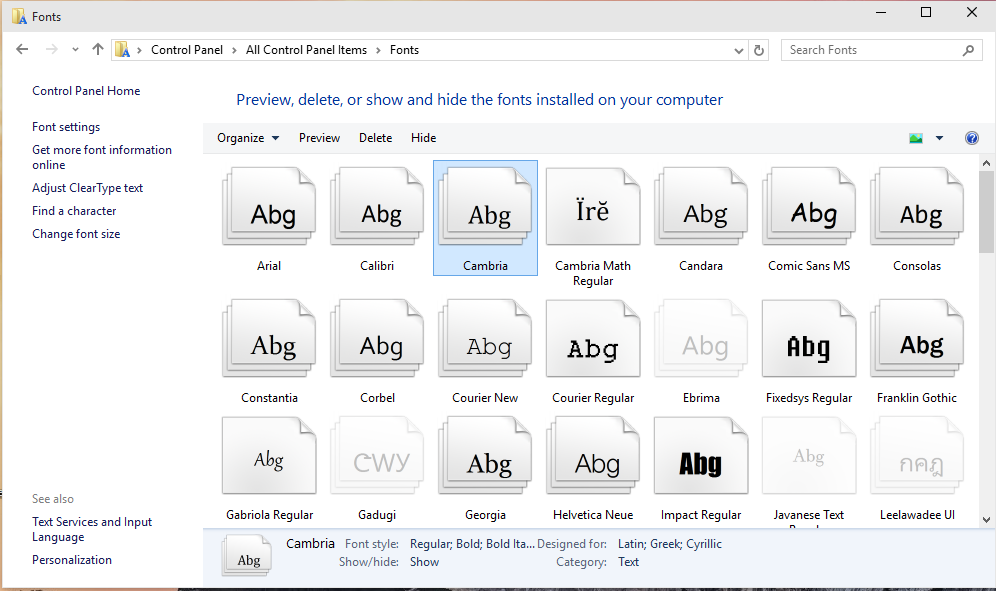
Using the control panel may take slightly longer due to searching. There, in the section called "Appearance and Personalization" you need to find the category "Fonts".
You can also do things here with fonts, such as deleting or hiding them for display in applications. The "View" button allows you to see the set before installation. In addition, to do this, you can simply double-click on the necessary files - in a second, the desired program will start.
Method 3. Installation in the standard way through the viewer. Open the font you like in it. Click "Install". After the installation is complete, you must restart the application in which you will use the kit, or the computer itself.
Installing fonts on macOS
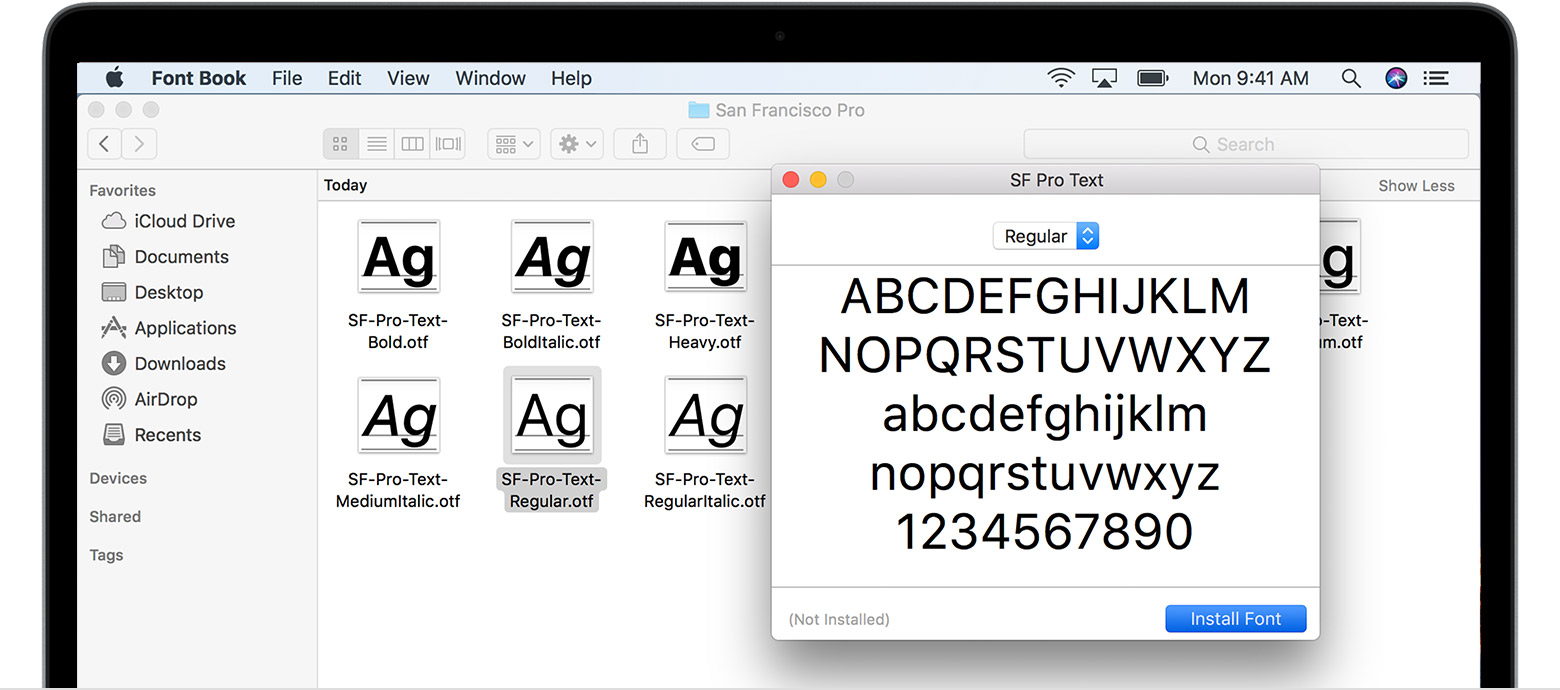
Apple products are distinguished by their finickyness in terms of downloading and installing programs. However, you should not worry about this. Fonts for macOS must be in the same formats as for Windows. There is only one installation method, but it also has its own catch: only an administrator can do this. Before the installation procedure, you must close all applications to avoid a malfunction in their work or the need to restart. In order to add fonts to the system, you need to double-click on the required file and then find the "Install" button. The success of the operation is determined by whether the Fonts program (that is, fonts) is opened. In order to give permission to install, follow these steps:
- Click on "Fonts" in the main menu;
- Open the settings;
- Look for "Default Account Locations";
- Activate "Computer";
- Enter your login credentials to verify administrator rights.
Done.
Installing fonts on Linux
Linux font sets must also be in EOT and TTF format. Fonts are divided into two categories here and, accordingly, are located at different addresses: global fonts in /usr/share/fonts, and custom fonts in .fonts (folder from the user's home directory). To connect your favorite fonts, you just need to move them to the required folder.
In newer Ubuntu releases, installation manipulation is minimal:
- Open the * .ttf file;
- In the viewer, choose Install or Install.
Installation in graphic editors (Photoshop, Figma, Sketch, Adobe InDesign, Adobe Illustrator and others)
Fonts are installed in popular photo and video processing programs in the same way as in the OS. The main thing is not to forget to reload the program before using the font.
Installing fonts on your WEB site
Installing fonts on the site will take a little tinkering. However, if you delve into the algorithm of the procedure, it will not take much time. After downloading the entire font to your computer, a file called stylesheet.css will appear in the archive, which will contain information about all the styles for connecting this font.
Now, your task is to include it in the main file. Let's take the Roboto font as an example.
Move the entire contents of the archive to the fonts/roboto folder. Then we install it.
This can be done via HTML (by writing: <link href="fonts/roboto/stylesheet.css" rel="stylesheet" type="text/css" />) or CSS (by writing @import url("fonts/roboto/stylesheet.css")).
Remember to write the path to the file correctly. If you only need to download and install one face, the procedure will look exactly the same.